The post The 411 On Extracting Honey From A Hive appeared first on Gracious Gardening.
]]>One of the most delicious things that mother nature has provided us with is the natural delicacy of honey. It can only be made by the talented busy bees, and mankind can’t touch that. We are always stealing honey from the bees after they have done all the hard work of making it. With that in mind, we had to come up with ways to protect ourselves as well as the bees when doing so. Naturally we would eventually conclude that we must make life a bit easier for the bees because they put money in our pockets as well as sweet stuff in our bellies. Here is 101 on extracting honey from our precious bees.
Doing it by hand the hard way
You can put on all your protective gear and pull out your honey comb frames making sure that the bees are smoked and calm. Take a knife and cut off the wax and scrape out the honey by hand. Some people may put the frames in a warm room and let the honey slowly drain out. If you choose to manually scrape out the honey, you will need to drain the honey from all of the wax that will be in the honey. This will cause the bees to work more to recreate the wax and start all over again.
Using an extractor
You do have the option of using a centrifugal extractor and letting the honey fly out with the spinning motion. The honey will collect at the bottom of the machine, which will consist of wax, bee parts, as well as honey, so it must be strained and filtered to get the best clear honey possible. One tool that you can use to help keep the comb intact is a roller with spikes that can be rolled over the wax to poke tiny holes in each cell. This will allow the bees to repair the holes instead of starting over. There will also be the job of cleaning everything up and placing the frames back into the hive.
There is a better way
Thankfully times have changed and new revelations have been discovered. Now there is a way to get your honey from the hive without hurting a single bee or making a mess. There is a new invention called the Flow Hive, which you can turn on a tap and the honey just flows out.
No matter how you decide to extract your honey, be kind to the bees and try to make things easier on them if you can. The makers of honey will appreciate all the love and help they can get. Every bee matters.
What do you know about extracting honey from a hive?
The post The 411 On Extracting Honey From A Hive appeared first on Gracious Gardening.
]]>The post Get Rid Of Moles Without Hurting Them appeared first on Gracious Gardening.
]]>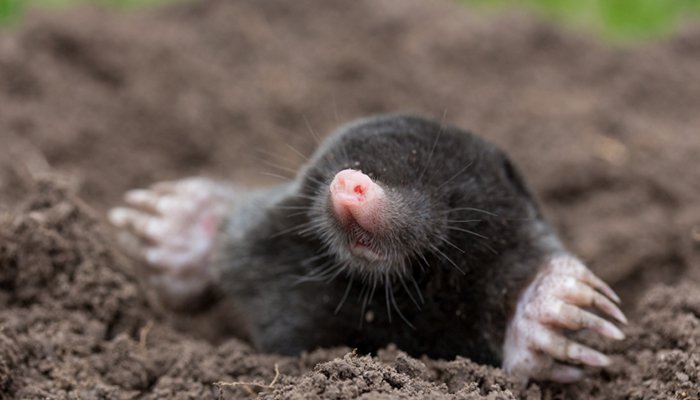
Moles can become a problem if there are several of them or if they dig where they disrupt the roots of your grass and plants. Unfortunately, if moles are a problem in your yard, the most reliable way to rid yourself of the problem is by trapping (and usually killing) the moles. If that’s not an option for you, here are two other ways to get rid of moles.
Barrier Method
While this method might not get rid of the mole completely, it will keep it out if certain areas of your garden. Once you locate the tunnel, you can burry small mesh, concrete or gravel at least two feet below the surface to block the little critter.
Soil Drainage
Moles are known to love moistness, so you can try to improve soil drainage to make the environment less comfortable for them.
Of course, if you want to capture and kill the animal, you can use a trap or call a professional to handle the situation, but try these ideas first, please!
Do you know of any other ways to get rid of moles?
The post Get Rid Of Moles Without Hurting Them appeared first on Gracious Gardening.
]]>The post Best Trees For A Beautiful Winter Landscape appeared first on Gracious Gardening.
]]>Evergreens
Of course, evergreens are a must in any yard. They are really the backbone of your landscaping all year long. Some good choices to consider when selecting evergreen trees for your landscaping needs are: silver Korean fir, blue spruce and dwarf spruces as well as any sort of pine tree. Choose trees that complement your overall look knowing these trees will be green year round.
Best Trees
There are several trees that are beautiful, even in winter, due to their unusual structure or the trunk or bark features. These dazzling trees can be used to plan ahead for the winter landscape.
Paperbark maple:

Flickr photo via FicARus
The paperbark maple has a peeling bark that makes it an interesting choice in any landscape. Its rich brownish red color will be a focal point in the colder months especially when there is snow on the ground.
Japanese maple:

With its intricately formed branches, the Japanese maple gives a sharp contrast to tall, straight tree trunks that may be in your yard. Growing to 15 or 20 feet, this tree grows well in almost any soil type and is easy to grow.
Tibetan cherry:

Tibetan cherry trees have a silk like red bark that is a very interesting pattern for winter viewing. The stark contrast of red against the dull landscape of winter is very striking and beautiful.
Stewartia pseudocamellia:

This peeling bark tree is also a gorgeous addition to your winter landscape. As the bark peels off the new bark creates a bright contrast in snowy landscapes. Stewartia pseudocamellia also has smooth lines that have an interesting shape.
Striped maple:

Flickr photo via placeuvm
Also known as tiger maple, striped maple has great vertical white lines on its bark that will provide a striking contrast to other trees in your yard. This is an ornamental tree that requires frequent pruning; however the year round beauty of this tree makes it a must have for your landscape.
Lacebark elm:

For that big shade tree, lacebark elm provides great shade in the summer while having an interesting bark that will still be beautiful in the winter. The exfoliating nature of the peeling bark and the interesting colors keep this tree interesting all year long.
The best tips to make your own trees dazzling is to choose interesting textures and growth patterns that suit your style and show up all year long.
Which do you think are the best trees for dazzling a yard?
The post Best Trees For A Beautiful Winter Landscape appeared first on Gracious Gardening.
]]>The post Time To Try Gardening With… Diapers? appeared first on Gracious Gardening.
]]>
How it all Works
If you have babies you have seen the amazing moisture retaining quality of today’s disposable diapers. These things have a small amount of crystals down the center that are embedded in cotton fibers. When moisture enters through the permeable barrier, these crystals can retain up to 500 times their weight! If you can harness that water retention potential in your flower pots and hanging baskets, your watering schedule could be cut in half and your plants could be protected from extremely hot and dry conditions that would normally stress it out even with the best watering schedule.
Make a Super Soil
The first way to use a diaper in gardening is to make a super soil. This is very simple to do. You will need to large container, a couple of disposable diapers, and some commercial potting soil. Open the diapers and place them in a container. Pour about four cups of water over each one and wait until all the water is absorbed. Detach and pull off the outer layer of material and you should see the gel like cotton and water crystals. Dump the gel into your mixing container. Pour in an equal amount of potting soil and use your hand to mix the gel and soil together. Now you can use this super soil to pot all your new plants.
Use the Crystals alone
You can open up a diaper and shake out the crystals. There is really a very small amount in each diaper. However, you can use the crystals alone and mix them with water to create a great solution for supplementing the soil in your potted plants or to help preserve fresh cut flowers for longer amounts of time. These crystals from diapers retain moisture and help you conserve water and grow healthy plants.
Do you know of any other uses for diapers in the garden?
The post Time To Try Gardening With… Diapers? appeared first on Gracious Gardening.
]]>The post FYI: Three Herbs To Help Control Mosquitoes appeared first on Gracious Gardening.
]]>While a store-bought mosquito repellent can be effective, it also can be infused with chemicals that could be dangerous to you or your child. Thankfully, there are several herbs that can protect you and your family against unwanted mosquito bites. Here are three mosquito control herbs that are easy to grow and beneficial in protecting yourself against mosquitos and other biting insects.
Lemon Balm
Lemon balm is an herb from the mint family and is very effective in controlling the mosquito population around your home. Plant this herb around your porch or patio areas to limit the number of mosquitos entering the area. Mosquitos do not like the smell or the flavor of lemon balm. Yet, it has a very fragrant lemony smell that is a pleasing to most humans. You can also crush the leaves and then rub the leaves over your skin to protect yourself or your children from mosquito bites. As a bonus, lemon balm has been shown to improve digestion and alleviate stress and anxiety. It can also relieve cold sores or fever blisters. A lemon balm tea can also calm an upset stomach or sooth colic in an infant.
Lavender
Lavender is also a member of the mint family (believe it or not) and has a lovely smell and delicate flowers. While many of our beauty and cleaning products are scented with lavender, you can also grow your own to naturally repel insects in your yard or garden, and when they are mature, they can be dried and used in DIY products that repel insects as well. Mosquitos do not like the smell of lavender and will naturally avoid it. When harvested dried lavender flowers can be mixed with white wine vinegar to make your own natural bug repellant. Lavender is also a lovely addition to any garden giving both practical and aesthetic to this little herb.
Peppermint
Another member of the mint family, peppermint is easy to grow and can be applied directly to the skin to help prevent bites from mosquitos. Just crush the leaves and rub the resulting juice on your skin. If you do get bitten by a mosquito, peppermint can also help relieve the itching that can result. Peppermint is a great addition to any herb garden. Peppermint tea has also been shown effective in helping with tummy aches and other digestive problems. Fresh or dried, this herb is also good for flavoring fruits and salads.
These three mosquito repellent herbs are all easy to grow and add to your herb garden. They also will help you control mosquitos both in your yard and on your skin.
The post FYI: Three Herbs To Help Control Mosquitoes appeared first on Gracious Gardening.
]]>The post 4 Delightful Things You Didn’t Know About Daisies appeared first on Gracious Gardening.
]]>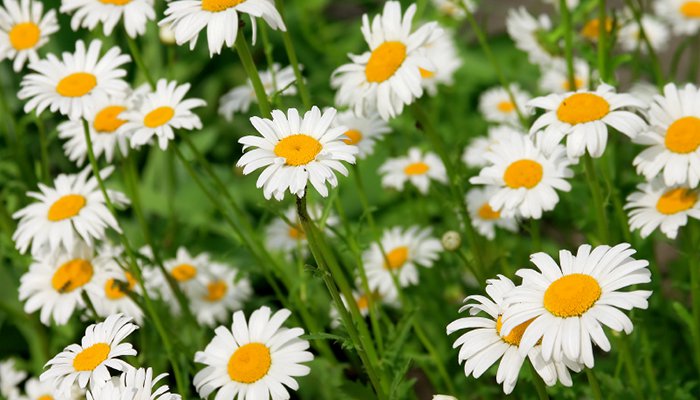
- Day’s Eye: The daisy got its name from old English and was once called the “daes eage” which translates to the day’s eye. The cute little flower closes its petals around its bright yellow center at night and opens back up with the sunrise, the start of a new day. The lovely yellow center is the sun and the white petals represent innocence. In the middle ages, children would make daisy chains to wear during May Day celebrations.
- Eat Up: Daisy petals are edible and can be used in making salads. Daisies have also been reported to reduce the pain of a headache. Daisy petals are related to the artichoke, and they are also high in Vitamin C which helps boost our immune system. So eat up and enjoy your daisies!
- Two Flowers: The daisy is actually two flowers in one. The yellow center is one bloom and the surrounding petals are another independent bloom. While native to north and central Europe, daisies can now be found on every continent except Antarctica. They are part of the largest group of flowering plants called Aster, and this family of plants constitutes around 10% of all flowering plants growing on the earth today. Most daisies have white petals and a yellow disc center, but there are also other colors to look for as well.
- Weeds: Unfortunately, if you don’t control your daisy population, they can become weeds. This is due to the fact that daisies are highly prolific and can thrive in almost any location and in almost any condition. There is a huge problem of English daisies as weed infestations in the American northwest. Just be careful and give your daisies adequate care and pruning to control the spread of the flowers beyond where you want or need them.
Do you know any fun Daisy facts?
The post 4 Delightful Things You Didn’t Know About Daisies appeared first on Gracious Gardening.
]]>The post Why You Should Pinch Your Herb Plants appeared first on Gracious Gardening.
]]>In the flower garden, you want to enjoy the beauty of the blooms you have been nurturing for months. However, with herb plants it is totally different. The taste of the leaves will grow bitter if the plant is allowed to bloom, and secondly, you will not get as large a harvest as you hoped for, and that’s why you’ll want to pinch your plants.
Pinching
Pinching your herb plants is basically a process of pruning. A plant’s natural tendency is to reproduce. As a result, as soon as an herb plant produces a bloom, it sends a message down the stem to stop producing leaves so the bloom can use most of the energy from the plant. The stem also stretches up to the sun and begins the process of blooming and producing seed. As a general rule, you want to prevent blooming in herbs as it is the leaves you want to use, not the fruit produced by the bloom.
Another result of the plant blooming is that the remaining leaves on the plant will turn bitter tasting which was not the goal of growing your own herbs at all. Pinching is an easy way to prevent the plant from blooming. When you remove the upper portion on the stem right before blooming, the stem tells the plant to hurriedly let the new leaf buds start forming new stems in order to get a new bloom going. In this way you can encourage new stems to grow thereby increasing the size of your plant and the number of leaves produced.
How to Pinch
Learning how to pinch plants is important. Just take you thumbnail and forefinger and pinch the stem off. Later in the season or with woodsy stems, you may need a small pair of scissors. Basil needs to be pinched the most often as it is a fast grower. You will look for new growth at the base of leaves and pinch the stem off just above where the new leaf buds are located. The plant will then start two new stems with the new leaf buds.
Repeat this process every week or so. You can really pinch basil back a lot without damaging the plant. This will allow you to increase your harvest of basil tremendously. With other herbs, you do not need to prune as often.
Keep an eye on the plants and pinch whenever you notice new blooms about to form. You may not want to pinch these as far down. Just pinch of the stem right below where the bloom is forming. With many herbs, natural harvesting when you need to use the herbs will be enough.
Learning why you need to pinch your herbs will allow you to reap a bigger and more flavorful harvest from your herb garden.
Do you pinch plants often?
The post Why You Should Pinch Your Herb Plants appeared first on Gracious Gardening.
]]>The post No Green Thumb? No Problem! Check Out These Easy-Care Flower Bed Ideas appeared first on Gracious Gardening.
]]>
Pea Gravel and Flower Pots
The absolute easiest flower bed to create combines pea gravel and flower pots. Use landscaping fabric as a base to stunt weed growth and lay pea gravel in your flower bed about one inch thick. Then use various sizes of flower pots and lawn decorations to fill up the flower bed. Garden well-established plants from your local nursery in the flower pots.
This allows you to get healthy plants that are already mature, and they look good the moment you pop them in. Use a potting soil that has an added plant food for great growth and lovely blooms. The beauty of this flower bed is that if one or more plants don’t flourish, they are easy to replace. You can also customize where the plants go and you can control the amount of sun and shade they get. You can be creative with bricks and other objects to lift up pots and have an amazing design that fits your style.
Hosta
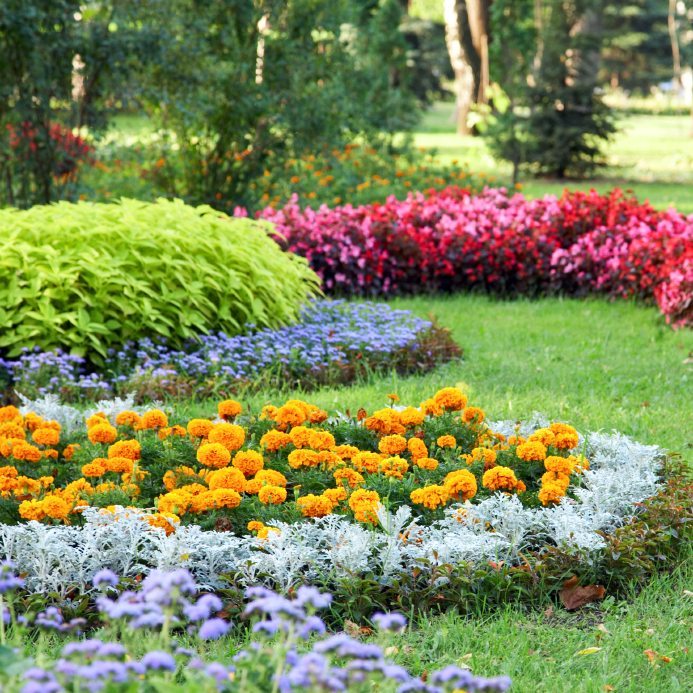
For shady areas where you never thought anything colorful would grow, plant a variety of Hosta plants. They come in all sizes and colors. With careful planning you can design a flower bed of just Hostas that love shade and bloom in mid to late summer, giving color and richness to your garden when many other annuals are beginning to fade. A good companion to these hardy plants is the Astilbe plant. They grow well with Hostas and provide a nice contrast in texture with their lacelike leaves.
Brown Eyed Susan and Aster
Brown Eyed Susans and Asters are a great little flower combination that will bloom from early summer through the fall, giving you a summer full of beautiful color. These two golden-hued plants pair up to grow an amazing flower bed. The Brown Eyed Susan is a long stem flower that is great for making bouquets throughout the season. Because these flowers are indigenous to the central and eastern part of America, they do very well in hot, dry areas. It’s hard to kill these beauties even if you forget to water them for several days.
These three easy care flower beds will provide you with beautiful variety and color to last the summer long while providing a worry free environment in which you don’t have to fret over forgetting to water the plants or if you are going to kill the pretty flowers.
What are your favorite flower beds to create?
The post No Green Thumb? No Problem! Check Out These Easy-Care Flower Bed Ideas appeared first on Gracious Gardening.
]]>The post 6 Great Gardening Books You Should Buy Right Now appeared first on Gracious Gardening.
]]>- Mini Farming: Self Sufficiency on ¼ Acre: Mini Farming: Self Sufficiency on ¼ Acre by Brett L. Markham is a great little book that uses a holistic approach to gardening that can help provide up to 80% of your family’s food or provide a great little side income.
- All New Square Foot Gardening: All New Square Foot Gardening by Mel Bartholomew is in its second edition and is immensely popular. A great source for educating yourself on gardening in small spaces, this book gives information on vertical gardening and pest control as well.
- Trowel and Error: Over 700 Tips, Remedies and Shortcuts for the Gardener: This book by Sharon Lovejoy is filled with practical and natural advice that Lovejoy has accumulated over a lifetime of gardening and working with plants. Environmentally friendly and giving sound advice to all gardeners, Trowel and Error: Over 700 Tips, Remedies and Shortcuts for the Gardner is a must have for your library.
- How to Grow More Vegetables: How to Grow More Vegetables by John Jeavons explains a bio intensive method of gardening that is very labor intensive but yields tremendous amount of food. The book also teaches how to make your own compost and discusses the benefits of double digging.
- Grow, Cook, Eat: A Food Lover’s Guide to Vegetable Gardening: With recipes and instructions on how to store your harvest as well as practical information on growing food, Grow, Cook, Eat: A Food Lover’s Guide to Vegetable Gardening by Willi Galloway is an important addition to your gardening library. Both novice and experienced gardeners will love this practical guide to the entire realm of growing, cooking and preserving food.
- The Backyard Homestead: If you have just a small area in which to plant your garden this is the book for you. The Backyard Homestead by Carleen Madigan describes how to produce all the food you need on just a ¼ acre of land. That’s your backyard, folks. As an added bonus, this book also has a section on harvesting and preserving your food. It even tells you how to make pickles!
Grab these books before the winter cold sets in and start pouring over all the information you need to build a better garden with a higher yield than ever. Or if you are thinking about doing a garden in the spring, start reading up now and learning all you can. These six great gardening books you should own can take your garden from good to great!
Do you know of any other great gardening books?
The post 6 Great Gardening Books You Should Buy Right Now appeared first on Gracious Gardening.
]]>The post Common Composting Myths You Need To Know appeared first on Gracious Gardening.
]]>Compost has a bad reputation as a nasty, stinky business. However, when done correctly, composting can be easily accomplished with very little effort. Here are some common composting myths that are just not true.
- Composting Stinks: The idea that composting stinks is a very common myth that probably derives from the fact that compost is made of decomposing plant matter, and we are conditioned to think that anything that is decaying is also smelly. In reality, composting will not produce an odor if done correctly. Composting experts recommend a ratio of 3:1 that includes three parts brown plant material (dried leaves and weeds) and one part “green” plant material such as food scraps or grass clippings. If turned properly and with the right ratio the decaying mass of plant matter will not produce a smell.
- Composting attracts rodents and pests: Many people think if there are kitchen scraps (i.e., food) just lying around, rodents and pests are bound to find them. The myth that composting attracts rodents and pests is easily combatted by the same principle as the smell. With the right ratio of plant matter, the decomposition will cause no smell which in turn will attract no pests, rodents or even flies. Another tip for allaying those rodent fears is to eliminate meat, fish and dairy food scraps from your composting ingredients.
- Composting takes a lot of time: Another common myth is that composting takes a lot of time. In reality, the time needed is no more than having a supply of brown plant matter that can be parceled out at the right ratio every time you have food or kitchen scraps on hand. It’s as simple as throwing in the kitchen scraps or the grass clippings from the last time you mowed the lawn with times as much leaf or weed matter. Give the ingredients a quick turn with the hoe or rake or turn the handle on a commercial bin, and you are done! By properly storing and using the waste from normal yard chores and using your own leftover kitchen scraps, composting for your own gardening needs is really an easy and time efficient thing to do.
- You don’t need fertilizer: Some people think if you use compost, you don’t need fertilizer. It is very important to understand that compost prepares the soil and helps give the plants an environment in which to thrive. However, while compost does contain a small amount of nutrients, you will still need to do a soil test and fertilize using the appropriate nutrients for you soil.
Composting can be easy and good for your garden. Don’t let these common myths about composting deter you from giving it a try!
Do you know of any composting myths?
The post Common Composting Myths You Need To Know appeared first on Gracious Gardening.
]]>