The post Five Health Benefits Of Beans appeared first on Gracious Gardening.
]]>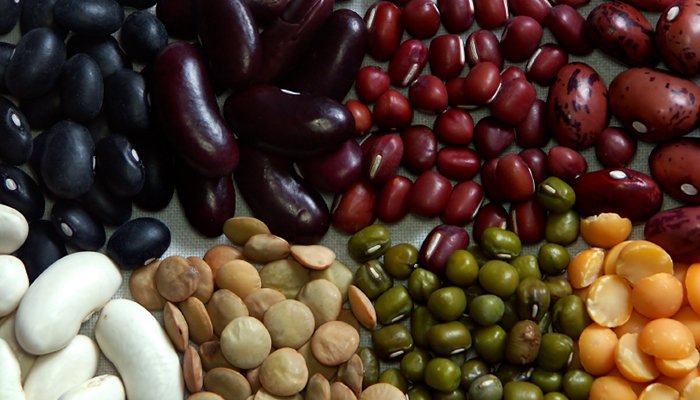
Health Benefits Of Beans:
1. Prevent Heart Disease
- It has been said in multiple medical studies that individuals who eat more beans develop a lower risk of heart disease. That’s because there are phytochemicals found in legumes, which work to protect your heart against it.
2. Fight Cancer
- Within beans, there are a whole slew of cancer-fighting plant chemicals. Some of these are isoflavones and phytosterols which have both been proven to reduce the risk of cancer.
3. Lower Cholesterol
- Beans are known to give the body soluble fiber. For those unaware, soluble fiber play a large role in controlling blood cholesterol levels. In fact, in various studies, it has been shown that 10 grams of soluble fiber reduce LDL cholesterol by roughly 10 percent. Besides this, beans also contain saponins and phytosterols which have been seen to lower cholesterol too.
4. Help Lose Weight
- One serving of beans will allow you to feel full much more quickly than other foods do. That’s because the rich fiber content fills up your stomach and then causes a slower rise in blood sugar. This will cause you to turn to snack foods a lot less often, so you are not eating as much without depriving yourself. Plus, beans give off a good boost of energy which is the push you may need to exercise for the day.
5. Aid in Managing Diabetes
- Beans are perfect for those individuals who currently have diabetes. This is due to the fact that beans have an ideal balance of both complex carbohydrates and protein. In turn, this mixture provides you with a slow but steady source of glucose. This is a breath of fresh air compared to foods made up of simple carbohydrates, since those leave you with a sudden influx of glucose.
With these five benefits in mind, it is quite clear that beans are a food that everyone needs in their diet.
Do you know of any other health benefits of beans?
The post Five Health Benefits Of Beans appeared first on Gracious Gardening.
]]>The post How To Choose Which Seeds To Procure appeared first on Gracious Gardening.
]]>
As a gardener, it is your job to decide which plants to save seeds from. While each situation is different, it’s best to choose the seeds that come from the most vigorous and healthy plants you have. That’s because those are the ones that produce both the vegetables and fruits you love to eat as well as the flowers you can’t stop looking at.
Different seeds to procure
Hybrids
- If there’s one type of plant you want to stay away from, it’s hybrids. These won’t produce productive seeds, as those are sold mainly in garden stores and are created by artificial cross-pollinating cultivars. That’s why you don’t want to save any of the seeds from hybrids. These seedlings are very different from the parent plant and aren’t any good at producing new life. If you see a seed packet with the word hybrid on it, toss it aside.
Open pollinated
- When you’re trying to procure seeds that can produce reliable results, turn to open pollinated plants. These are non-hybrid cultivars that can reproduce through either cross pollination or self pollination. The seed that is saved here from an open pollinated plant will breed properly as long as it does not cross pollinate with another plant of the same species.
Self pollinating
- Then, there are self pollinating plants like tomatoes, peas, lettuce and beans. These plants contain flowers that have both male and female parts. Thanks to this, each flower can be fertilized from itself or a flower nearby that’s on the same plant. When you procure a seed that comes from one of these self pollinating plants, you are practically guaranteeing yourself an identical plant to what you already have. However, keep in mind that there is always the chance here that an insect can transfer a small amount of pollen from one cultivar to the next. If that happens, the seed that was produced from that flower will be completely different from the seed that is produced by all the other flowers on the plant.
When you procure the right seeds for your garden, you will truly end up with the results you were hoping for.
Based on the seeds to procure that we’ve listed, which do you usually choose?
Image: iStockPhoto
The post How To Choose Which Seeds To Procure appeared first on Gracious Gardening.
]]>The post Get The Most Out Of Your Vegetable Garden appeared first on Gracious Gardening.
]]>
Whenever you make the decision to plant a vegetable garden, you likely have high hopes for it. You want to enjoy as much yield as you possibly can from it. Below are some planting methods that have proven success when it comes to delivering a strong and bountiful vegetable garden.
How to get the most out of your vegetable garden
Method One: Thinning Plants
Thinning is a part of gardening that usually applies to those crops who have seeds so small that it’s hard to space them enough distance apart at planing time. Thanks to this, vegetables like lettuce, turnips and carrots tend to be planted in a thick manner. When that happens, the plants don’t receive the moisture and nutrients they need. Thinning, though, gives the plants the right amount of distance so that they’ll get enough food and water daily. Remember, every time you finish thinning your plants, you must lay down a little fertilizer and water as this will perk up the remaining plants.
Method Two: Succession Planting
If you want to increase and extend the harvest of the different crops in your vegetable garden, you should consider succession planting. For example, if you were to plant lettuce, you may notice that in two short weeks the plants have come up. Then, in another couple of weeks the lettuce is ready to pick. Instead of sowing all of your seeds at the exact same time, you can opt for staggering when you plant into two-week intervals. This helps you avoid any gaps so that there is not halt in production or consumption. Overall, succession planting works best with those crops that can be grown quick so that they are ready to harvest within 60 short days from when the seed was originally sown. Some great vegetables to use this method on are greens, squash, beans, carrots, turnips, cucumbers and beans.
Planting your vegetable garden should be a pleasant experience. From growing your seeds to enjoying your harvest, there is much to look forward to here. However, to optimize this whole process even more, it’s in your best interest to participate in both thinning your plants and succession planting. This will help you get the most out of your vegetable garden.
Image: iStockPhoto
The post Get The Most Out Of Your Vegetable Garden appeared first on Gracious Gardening.
]]>The post How To Section Off Your Garden To Achieve The Perfect Look appeared first on Gracious Gardening.
]]>
When it comes to your garden, you want to achieve the perfect look. While this may sound pretty simple, it’s not. That’s why you need to section off your garden properly. When you do this, you will truly create the garden of your dreams.
How to section off your garden
1. Think about your must-haves
- When you’re sectioning off your garden, you need to compromise. While you may want to include everything from luxurious landscaping to a fish pond, there’s not always room for it all. That’s why before you begin planning your garden, figure out what kind of items will enhance the space even more. What are some objects and elements that you can’t possibly live without in your outdoor area? Do you feel it’s necessary to have a vegetable garden or would you rather fill that space with bamboo products? Once you know what your priorities are, you can then start basing the rest of your garden around it.
2. Take note of the whole space
- Don’t forget to keep your whole gardening area in mind. Where will all your essentials go? You don’t ever want your garden to feel cluttered, because after all, you want everyone to enjoy it properly. That’s why you need to carefully plan where you want everything to go, while separating areas accordingly.
3. Outline your plans
- Once you decide what elements need to be placed in your garden, it’s time to figure out how to best utilize your space. Then, from there, draw it out on paper. When you have this drawing of how everything needs to be laid out and sectioned off, it will be so much easier for you to get your garden looking exactly how you first envisioned.
4. Stick with a simple design
- You may be tempted to make your theme and color scheme a big to-do, but it’s not worth it. When you put out too many products in a variety of styles, this can become extremely overwhelming. Remember, you want your garden to be a soothing and relaxing place, so keep it all simple. Limit your garden to a few benches and accessories, while keeping that neutral tone.
Reference:
http://www.houzz.com/ideabooks/418192/list/4-steps-to-the-perfect-garden
Image: iStockPhoto
The post How To Section Off Your Garden To Achieve The Perfect Look appeared first on Gracious Gardening.
]]>The post How To Start A Community Garden appeared first on Gracious Gardening.
]]>
Have you ever wanted to plant a vegetable or flower garden but didn’t have the room in your yard? If so, no worries. There is another solution here. You and your neighbors can always turn an unused piece of land into a community garden.
Find out how to start a community garden below:
Step One: Find People to Start This Garden With
- The best way to find participants for the community garden is to organize a meeting with some of your friends and neighbors who are just as interested as you. If you believe that there are enough people who want to create a community garden, make a decision together to go ahead and start one.
Step Two: Pick Out a Kind of Garden
- Once you have decided as a group that you want to start a community garden, you need to select a type of garden. For starters, do you want a vegetable garden, a flower garden or a combination of both? Will the garden be organic or not? Is each member going to have their own plot or will everyone work on the land together? How will the community garden get its seeds, gardening tools and other equipment? Will local businesses donate these items? These are important questions to think about ahead of time.
Step Three: Select a Site
- Scout out different sites around town that have a water source. Also, if you are growing vegetables you will need to find a spot that will get at least six full hours of sunlight daily. When you finally have picked a site you like, talk to the owner of the land about using or leasing the property.
Step Four: Lay Down Some Ground Rules
- To make sure that the community garden is successful, you will need to set some ground rules. This includes everything from deciding what will happen to a member if they neglect their plot to what the maintenance of the common areas are.
Step Five: Prepare the Land
- Now that you’ve decided on the land, test out the soil to see what nutrients it may need. You can even find kits for this at local gardening centers. From there, gather up everyone to clean, fertilize and till the land.
Step Six: Plant the Crops
- Lastly, you need to plant whatever crops you’ve decided on as a group, whether that is flowers, vegetables or fruits.
Reference:
http://www.howcast.com/videos/316380-How-To-Start-a-Community-Garden/
Image: iStockPhoto
The post How To Start A Community Garden appeared first on Gracious Gardening.
]]>The post How To Make A Water Garden appeared first on Gracious Gardening.
]]>
If you want to add a bit of ambiance to your backyard, you definitely need to make a water garden. These water gardens will prove to be a fantastic addition to your hard for the barbecue season when you have all of your family and friends over. It doesn’t matter if you opt for a small water garden or a large one, a water garden with just plants or one that has some fish too, as either way this garden will be quite the visual experience.
Learn how to make a water garden below:
1. Research
- Before you start making your water garden, you have to do some research. This is when you will figure out what kind of water garden you want to install in your backyard. Remember, there are all different types to choose from so know what you want ahead of time.
2. Pick the Right Location
- Now that you know what kind of water garden you want, you need to find the right location to construct your water garden. After all, you want your water garden to thrive. Choose an area that has full sunlight, as that will allow your plants to grow better. You also need to select a spot that is wide open and doesn’t have any trees nearby. That’s because the tree will leave you with unwanted shade and you’ll constantly be having to clean the leaves and other debris out of your garden.
3. Figure Out the Size of Your Water Garden
- If you are unsure of where to place your water garden, you should pick a small one. When your water garden is small enough, you can move it from one location to the next until you find the right spot. Small water gardens are also great if you don’t have a lot of room in your backyard. If you want to have a lot of plants, fish or a fountain, than a large water garden would be better suited for you.
4. Select a Container and Liner for Your Water Garden
- For those of you who decide to have a small water garden, choose a wooden barrel or tub. Then, line the barrel with plastic because if you don’t, the rotting wood can damage your plants. Those with a large water garden have more choices for their liner. They can select a liner that is concrete, brick, clay, plastic or fiberglass.
5. Decide If You Want Accessories
- Figure out if you want to get items like a pump, filter or lights for your water garden. If you decide on fountains and waterfalls, you will need to get a pump and filter.
6. Dig a Hole and Prepare It
- If you decide on a large garden, you will need to dig a hole. Your hole must be shallow at one end and then gradually deepen throughout the rest of it. Make sure to clean out any debris that may be in the hole like rocks, roots and sticks. That’s because these items can puncture the lining. Next, place about an inch of builder’s sand into the bottom of the hole. From there, place the liner in the hole and fill it with water. Everything you do after this is completely up to you. If you prefer having rocks, stones, slabs or plants to bring a natural look to your water garden, do so accordingly.
References:
http://www.gardeners.com/how-to/water-gardening/5078.html
http://www.familyhandyman.com/landscaping/backyard-waterfalls/how-to-build-a-water-garden-with-waterfall/view-all
Image: iStockPhoto
The post How To Make A Water Garden appeared first on Gracious Gardening.
]]>The post How To Use Growing Bags For Plants appeared first on Gracious Gardening.
]]>
For those that do not know, growing bags are actually plastic bags that are filled with a peat-based compost. They’re typically used for small gardens, balconies or any place where there isn’t a lot of space to fully garden.
Below you will find out how to use growing bags for your plants:
Step One: Create your growing bag
While you can definitely buy a growing bag at your local nursery, many individuals choose to make their own instead. If you put together your own growing bag, you need to add a good quality peat-based compost mixture to it. From there, cut a rectangular slit into the bag. This will leave you with a rectangle that has edges on the top half of the bag. You’ll also want leave plenty of edging to hold the peat compost mixture completely.
Step Two: Grow your plants
First off, lay out your growing bag right where you normally plant your crops. Then, begin planting shallow-rooted plants in the bag. Usually, you will find items like tomatoes, eggplants, marrow, strawberries and flowers planted in these growing bags. Any deep-rooted vegetables like carrots or beetroots won’t do well in the shallow bag soil. The bag needs to remain well-watered at all times. To do this, poke a few drainage holes in the side of the bag. At times the plastic will end up heating the peat-compost mixture, so keeping your soil moist is crucial.
Step Three: Add in the finishing touches
As the growing season progresses, it’s important to add more nutrients to your plants. That’s because over time, the peat-compost mix will end up losing it’s nutrients so you have to put in new ones. Generally, though, a compost tea addition is ideal. You should also pop up any tall plants as you see fit. You may need to use stakes or any items like that to stand up the plants as they continue to grow. However, you have to be extra careful not to pierce these through the bottom. When the next growing season approaches, you can reuse the growing bag.
References:
http://homeguides.sfgate.com/use-plastic-bags-containers-grow-vegetables-70821.html
http://www.bbc.co.uk/gardening/basics/techniques/growfruitandveg_usingagrowingbag1.shtml
Image: iStockPhoto
The post How To Use Growing Bags For Plants appeared first on Gracious Gardening.
]]>The post How To Stop Jalapeños From Turning Black appeared first on Gracious Gardening.
]]>
Jalapenos are the perfect addition to any meal thanks to their spicy heat flavor. While most jalapenos are green when you pick them, some can be black. This is definitely something you don’t want. Thankfully, there are ways you can stop your jalapenos from turning black.
How To Stop Jalapeños From Turning Black
Step One: Recognize what shade of green your jalapeno should be
- First and foremost, you need to know what type of green your jalapeno should be. Jalapenos should be either a forest green, light green or medium green. Remember, if it’s black, you’ll notice it right away. The black will be very dark and may even come in patches.
Step Two: Pick your jalapeno once it is ripe
- Typically, a jalapeno ripens in a week, although that can always vary. That’s why it’s best to pick your pepper before it has the chance to turn black. This can be difficult, though. To find out if your pepper is ripe, you must check it frequently. On average, the jalapeno is anywhere from 5 to 10 centimeters when it’s ripe.
Step Three: Enjoy your green jalapeno
- If you follow through with the steps listed above, you will end up with a jalapeno pepper that is green.
Keep in Mind:
Remember, while you don’t want to end up with a black jalapeno pepper, this doesn’t necessarily spell out trouble for you. There’s actually nothing wrong with black peppers, unless they are rotten. In that case, you wouldn’t want to eat them. Usually, black peppers are much hotter than green ones, so if you prefer a spicier taste you may want to opt for a pepper that is black. You have to be careful, though, when you are growing jalapeno peppers. Jalapeno peppers that are black usually mean that the vegetable is ripe. If you end up picking your pepper too soon to avoid it turning black, this could cause you to end up with a pepper that isn’t ripe enough. Of course ripe peppers taste differently from ones that aren’t ripe, but the difference is not even big enough for most people to notice. With this being said, you should always strive for a green jalapeno pepper that is just the right ripeness.
The post How To Stop Jalapeños From Turning Black appeared first on Gracious Gardening.
]]>The post How To Save Over-Fertilized Plants appeared first on Gracious Gardening.
]]>
Have you ever noticed brown spots on your plant’s leaves? Are many of the leaves wilting? Is there a white crust developing on either the plant or the soil? If so, there is a very good chance that your plant has been over-fertilized, as these are all symptoms. Thankfully, though, there are steps you can take to revive your plant.
How to Save Over-Fertilized Plants
Step One: Get rid of any visible fertilizer
- Begin by removing any fertilizer that you see. If the fertilizer is a powder, and you see it laid out on top of the plant or the topsoil, make sure to dispose of it. This will help prevent your plant from any further overfeeding. Similar to this, if you see that the fertilizer salts have formed a white crust, eliminate that as well.
Step Two: Drain the soil with water
- This step is crucial because it will help move the fertilizer far away from the plant’s root system, ultimately preventing any additional over-fertilization from occurring. This will also allow the plant’s roots to start healing from what it went through.
Step Three: Eliminate damaged leaves
- Grab a pair of scissors and begin cutting off any leaves that you notice look burned. In this case, they will have brown spots on them. Also, remove any leaves that are wilted or have an irregular shape. Even if you are able to save your plant that has been over-fertilized, there is no hope for these leaves. They have already been damaged and cannot be revived at all. Getting rid of these leaves is important to ensure that your plant gets healthier. Actually, if you keep them on your plant, it may become infested with pests.
Step Four: Don’t fertilize your plant
- If your plant has been over-fertilized, the last thing you want to do is give it more fertilizer. Wait until the plant looks healthy again, which typically occurs within 3 to 4 weeks. You have to give your plant and its roots time to recover from the strain of being over-fertilized.
Step Five: Put your plant in a new pot
- Placing your plant in new soil has been known to really help both the plant itself and the roots heal.
References:
http://www.guide-to-houseplants.com/fertilizer.html
http://thegardenersrake.com/plant-care-saving-a-plant-that-received-too-much-fertilizer
Image: iStockPhoto
The post How To Save Over-Fertilized Plants appeared first on Gracious Gardening.
]]>The post Three Ways to Ripen Green Tomatoes appeared first on Gracious Gardening.
]]>
There is nothing more frustrating than having a bunch of green tomatoes in your possession. Not only do these tomatoes look unappealing, they taste horrible too. Thankfully, there are simple ways for you to ripen these tomatoes up.
Ways to ripen green tomatoes:
1. Jar Method
- Start by grabbing a bunch of jars and removing the lids from them. Remember, these lids can be made from all types of materials such as plastic or glass. Once the lids are removed, put one ripening banana in each jar. Then, place two to four medium-sized green tomatoes per jar. You don’t want to put in too many tomatoes in each jar because this could cause them to bruise. Next, put the lid back on tightly. Leave the jar in an area that’s warm yet far away from direct sunlight. Make sure to check on your tomatoes often. If you notice that the banana is rotting before the tomatoes ripen, remove it and put in a new banana. With this method, you should have ripened tomatoes within a week or two.
2. Plastic Bag Method
- Grab a couple of plastic bags and begin poking a bunch of “air circulation” holes into them. Then, similar to method 1, put three to four tomatoes and one banana in each bag. You may be able to add a few more tomatoes per bag depending on the how large or small the bag itself is. However, don’t over-stuff your bags in the process. When you’re done with that, leave your bags in an area that is out of direct sunlight until you notice that the tomatoes have ripened.
3. Paper Bag Method
- Here, you will need a paper bag as well as your green tomatoes and a banana that is ripening. Place the fruit into your paper bag. Unlike the other methods, there is no set amount of green tomatoes that should be put into each bag. Instead, just fill your paper bag with the tomatoes until there is no more room. From there, lay the paper bag out in a place that is semi-humid and far from any sunlight. In time, you will notice the green tomatoes ripening.
References:
http://gardening.about.com/od/growingtips/qt/Green_Tomato.htm
http://www.coopext.colostate.edu/4dmg/VegFruit/ripening.htm
Image: iStockPhoto
The post Three Ways to Ripen Green Tomatoes appeared first on Gracious Gardening.
]]>